creating_routing_lists
Creating Routing Lists
To create a routing list for a subscription:
- Select the Manage Subscriptions tab for a serials record
- Select the subscription from the list
- From the Actions menu, select “Additional Routing”; alternatively, right-click on the subscription and select “Additional Routing.”
A dialog box will appear where you can create the routing list. You may route the title to one or more users or locations/departments.
To route a title to one or more users:
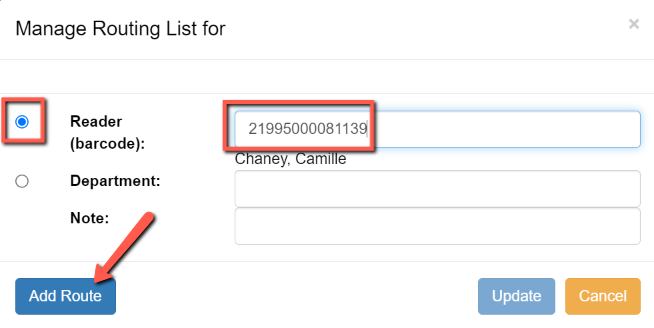
- Scan or type the barcode of the user(s) that the items should be routed to in the Reader (barcode) field
- Click “Add Route”
- Add a note, if needed
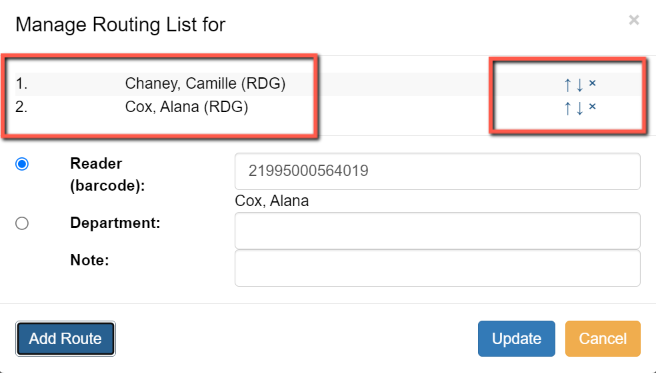
- Continue adding barcodes until the list is complete
- The names and departments on the list will appear at the top of the dialog box and can be reordered by clicking the arrows or removed by clicking the x next to each name or department.
- When the list is complete, select “Update”
To route items to a location or department:
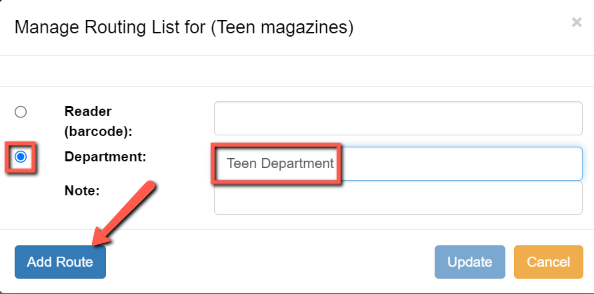
- Click the radio button next to Department
- Type in the routing location(s)
- Add a note, if needed
- Click “Add Route”
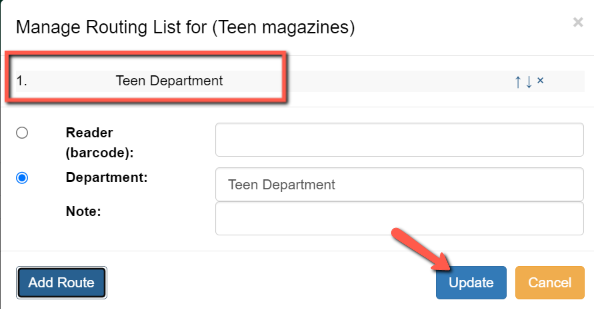
- The names and departments on the list will appear at the top of the dialog box and can be reordered by clicking the arrows or removed by clicking the x next to each name or department.
- When the list is complete, select “Update”
creating_routing_lists.txt · Last modified: 2024/08/19 08:53 by bwillis


